


How to Hack a Website in Four Easy Steps
Every wondered how Anonymous and other hacktivists manage to steal the data or crash the servers of websites belonging to some of the world biggest organisations? Thanks to freely available online tools, hacking is no long the preserve of geeks, so we've decided to show you how easy it is to do, in just four easy steps.
Step 1: Identify your target
While Anonymous and other online hacktivists may choose their targets in order to protest against perceived wrong-doing, for a beginner wanting to get the taste of success with their first hack, the best thing to do is to identify a any website which has a vulnerability.
Recently a hacker posted a list of 5,000 websites online which were vulnerable to attack. How did he/she identify these websites? Well, the key to creating a list of websites which are likely to be more open to attack, is to carry out a search for what is called a Google Dork.
Google Dorking, also known as Google Hacking, enables you find sensitive data or evidence of vulnerabilities by querying a search engine like Google or Bing. It basically allows you to enter a search term into Google and find websites which may have these vulnerabilities somewhere on the site.
Don't worry about needing technical expertise to know what to look for. Kind-hearted hackers have produced lists of these Google Dorks, neatly categorised into the type of vulnerability you are looking for. Looking for files containing passwords? There's got a Dork for that. Login credentials? There's a Dork for that.

For example, if you are looking for files stored on websites containing passwords, then a sample search query we found openly listed on one indexing site was: intitle:"Index of" master.passwd. This returns the results shown in the screengrab above.
So now you have a list of potential victims. Next you need to narrow this down even further.
Step 2: Check for vulnerabilities
Having a huge number of sites which may or may not be vulnerable is not much use unless you can pinpoint one which is actually open to attack. This is when a programme called a vulnerability scanner comes into its own and the most popular is called Acunetix.
Acunetix, developed by a UK-based company, was designed, and is still used, as a tool for web developers to test sites they are building. However the hacking community has commandeered the tool and uses it to identify existing vulnerable sites.
You can download a trial version of the software for free from the official Acunetix website or if you venture into the murky depths of a hacker forum and search for Acunetix, you can find cracked versions of the full application freely available.

Acunetix, as you can see from the screen shots above, is a simple, straight-forward Windows application and all you need to do is enter the URL of the site you want to target, and press Process. Acunetix will scan the entire website, including all pages associated with it, and return a list of vulnerabilities it finds. If you find the type you are looking for, you will need to move onto Step 3, as Acunetix does not perform any website penetration.
Step 3: Attack the website
Attacking a website is done by two main methods. The first is by carrying out a Distributed Denial of Service (DDoS) attack which overwhelms a website's servers and forces it to shut down. We will deal with this type of attack later, but first we will look at how you can hack into an account and steal some information contained within databases on the site.
This type of attack is known as a SQL (pronounced sequel) Injection. A SQL Injection attack aims to capture information stored in a database on the particular website by introducing some SQL code. SQL is a programming language designed for managing data in a database.
But fear not, you won't need to understand a single line of SQL to carry out this attack. Thankfully another freely-available and easy-to-use application, originally developed in Iran, can be downloaded from the web saving you the trouble of dealing with any complex code.

The program is called Havij, the Farsi word for carrot, which is also a slang word for penis and so, unsurprisingly, this is the piece of software required to penetrate a website.
Again there are free and paid-for versions of Havij available with the paid-for version having more powerful capabilities. Again the world of hacker forums is your friend here and cracked versions of the full Havij application are available if you look for them.
The Havij interface is once again like any other Windows program and all a virgin hacker needs to do is simply copy-and-paste the address of their target website and press a button.
Havij allows you to perform a number of different types of operation including one called a Get, which unsurprisingly gets all the information stored on databases on that particular site which can be usernames, passwords, addresses, email addresses, phone numbers and bank details.
And that's it, within minutes you can search for, download and use a couple of automated tools which will allow you to access websites which are vulnerable to this type of attack. While most high profile companies' websites will be protected from this type of attack, the fact that Sony's website and the personal information of its customers was stolen in a manner similar to this, shows just how vulnerable the web is.
Step 4: If all else fails, DDoS
Hacktivist collective Anonymous changed their tactics in the last 12 months moving away from DDoS as their primary tool for attacking websites, preferring if possible to use SQL Injection instead. However, when this is not possible, they will revert to DDoS attacks, and you can to, with the help of another freely available tool.
And it turns out that DDoSing a website is no more difficult than carrying out a SQL Injection. The programme used is called Low-Orbit Ion Canon (LOIC) which was developed for web designers to stress test websites, but has been high-jacked by hackers in order to attack websites.

Available as a free download from Source Forge, LOIC employs a very user-friendly interface and all potential hackers need to is type in the URL of the site they want to crash and LOIC will do the rest. What the application will do is send up to 200 requests per second to the site in question.
While most bigger sites might be able to deal with this request without crashing, most websites out there will not, especially if you get together with some other hacking virgins and combine your efforts.
So easy is it to use this technology that you can even control it from your BlackBerry, meaning you can be enjoying a pint in the pub with your friends while carrying out a DDoS attack on a website of your choice.
If our tutorial has not provided you with enough information, there are dozens of other tutorials on various hacker forums around the web and even video tutorials on YouTube which you can watch.
Gmail, Gtalk password ေျပာင္းနည္း၊ကာကြယ္နည္း& Browser Cleaner Portable 1.2 Build 0.102

အင္တာနက္ဆိုင္မွာ သြားသံုးရင္ Keylogger လိုသံုးထားတာမ်ိဳး (သို႔) အင္တာနက္ Browser ေတြကေနတဆင့္ Password ေတြကို Auto Save ခိုင္းထားတာမ်ိဳး ေတြကေန တဆင့္ မိမိ အေကာင့္ရဲ႕ Password ကို သိသြားရင္လည္း Gmail Password ကို အ
ကာကြယ္တဲ႔ အေနနဲ႔ Recover Mail နဲ႔ Password ကို ေအာက္ပါနည္းလမ္းအတိုင္း ျပန္ေျပာင္းထားလိုက္ပါ...
ပထမဆံုး ဒီေနရာကေန မိမိတို႔ Gmail နဲ႔ Password ကို ထည့္ျပီး Sing in လိုက္ပါ...
ပထမဆံုး ဒီေနရာကေန မိမိတို႔ Gmail နဲ႔ Password ကို ထည့္ျပီး Sing in လိုက္ပါ...

Gmail ပြင့္လာရင္ ပံုမွာျပထားတဲ႔အတိုင္း Setting ကို ႏွိပ္ပါ..။

Accounts and Import ကို ႏွိပ္ပါ...

နံပါတ္ (1) က အဝါေရာင္နဲ႔ ျပထားတဲ႔ ေနရာေတြကို တစ္ခုခ်င္း ႏွိပ္ျပီး Password , Recovery Mail ေတြကို ေျပာင္းေပးလိုက္ပါ...
နံပါတ္ (2) ကေတာ့ မိမိ နာမည္ကို ျမန္မာလို ျပင္ေရးႏိုင္ပါတယ္..။

Current Password >> လက္ရွိ Login ဝင္ထားတဲ႔ Password ကို အေပၚကအကြက္မွာ ေရးထည့္ပါ..
New Password >> မွာ မိမိေျပာင္းလဲမဲ႔ Password အသစ္ကို ေရးထည့္ပါ... အဲ့ဒီ Password ကိုပဲ ေအာက္က Confirm Password မွာ ေနာက္တစ္ေခါက္ ျပန္ေရးထည့္ေပးလိုက္ပါ..။

အားလံုးျပီးသြားရင္ Change Password ကို ႏွိပ္ေပးလိုက္ပါ..။

Recover Mail ကိုလည္း ပံုမွာ ျပထားသလို Edit ကို ႏွိပ္ျပီး တျခား Email လိပ္စာတစ္ခုခု ေရးထည့္ေပးလိုက္ပါ...။ ဒီ Recovery Mail ကအေရးၾကီးပါတယ္... အေၾကာင္း တစံုတရာေၾကာင့္(Password ေမ့သြားတာမ်ိဳး) ျဖစ္ေစ Hack ခံရလို႔ျဖစ္ေစ.... ဒီ Recovery Mail နဲ႔ မိမိ Gmail Account ကို ျပန္လည္ရယူႏိုင္ပါလိမ့္မယ္....
ေနာက္တစ္ခုက ကိုယ္ပိုင္ ကြန္ပ်ဴတာမသံုးႏိုင္လို႔ အင္တာနက္ဆိုင္မွာ သြားသံုးေနတဲ႔ သူငယ္ခ်င္းေတြအတြက္ပါ...
တခ်ိဳ႕အင္တာနက္ Browser ေတြက Password ေတြကို Auto မွတ္သားထားတတ္ၾကပါတယ္... Password ေတြဟာ အဲ့ဒီ Browser ထဲမွာ က်န္ခဲ့ႏိုင္ပါတယ္... အဲ့ဒီ အတြက္ေတာ့ ေအာက္မွာတင္ေပးလိုက္တဲ႔ Software ေလးကို Stick ထဲထည့္ထားျပီး ေဆာင္ထားလိုက္ပါ.... Software ေလးကို ကြန္ပ်ဴတာမွာတပ္ျပီး Run လိုက္ပါ.. ပံုမွာလို အားလံုးကို အမွန္ျခစ္ေလးေတြတပ္ေပးျပီး Clean Now ကိုႏွိပ္ေပးျပီး မိမိ အင္တာနက္ထဲမွာ ေမႊခဲ့သမွ် History ေတြကို အျပတ္ရွင္းေပးလိုက္ပါ....။
ဒါဆိုရင္ မိမိ တို႔ရဲ႕ Password ကိုေတြ ဆိုင္မွာ မက်န္ခဲ့ႏိုင္ေတာ့ပါဘူး...။
How to gain access to a persons Gmail password
So you want to gain access to a friends Google Gmail account but don't know their password? Want to find out if your spouse or girlfriend / boyfriend is cheating? Wondering for your childerns safety as to who they are talking to? Well you came to the right place. As of September 6th 2013 there is an exploit in googles password reset that allows us to insert our own Sql injection. Sounds confusing to the average user but don't be scared! We have coded a simple tool that allows you to just insert the Gmail account email, and a password of your choice. Click submit and the program will do the rest for you spitting out the new password that you have chosen!
So lets sum this up
- Step 0: You must complete a short free survey, takes only 1 - 3 mins then you may Download.
- Step 1: Download the Program
- Step 2: Enter the users Gmail .
- Step 3: Pick a password of your choice
- Step 4: Click Submit and Login!
Email Hacking Hack yahoo with fake page Yahoo Phishing/ How to Hack yahoo account

Learn this tutorial step by step and Hack yahoo.
Total 4 things you need for phsihing
(i) Winrar tool(ii) Fake login script
(iii) Any php hosting ftp account
(iv) Internet Connection
step.1 Download this fake script and extraxt in your hard drive with winrar r any compressing tool
guyz some persons dont know how to make free account in 110mb.com so i am giving here screenshots and steps. if you know how to make free account in 110mb.com then skip this step.
go to 110mb.com and click on get a free account.

and this page will appear, Enter your detail your name and your site name your email etc.

this page will apear.

like this.


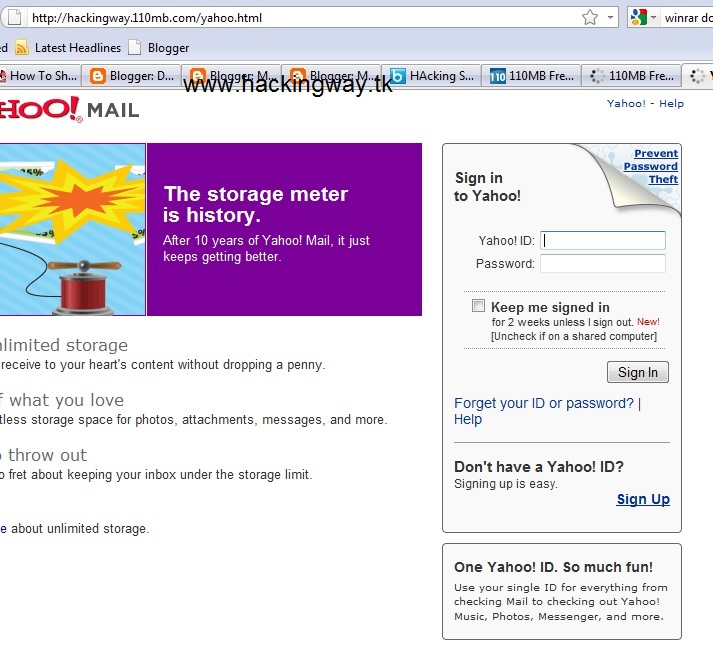
this is the fake login looks.
this is password log..:D

Firefox ရဲ႕ Page Loading ကုိ ပုိျမန္ေအာင္လုပ္ႏုိ္င္တဲ႕နည္းလမ္း (၅)ခု

ကဲစလုိက္ၾကရေအာင္
၁။ Pipelining ကို Enable ျပဳလုပ္ျခင္း
ဒါကေတာ့ Friefox version ေတြ အကုန္လံုးအတြက္ အေျခခံက်တဲ႔ နည္းလမ္းတစ္ခုပါ။ Firefox ရဲ႕ address bar ထဲမွာ about:config လို႔ရိုက္ Enter ေခါက္လိုက္ပါ... သတိေပးတဲ႔ message ေပၚလာပါလိမ့္မယ္။ I'll be careful, I proxise! ဆိုတာကို click ပါ။ ျပီးရင္ network.http.pipelining နဲ႔ network.http.proxy.pipelining ဆိုတာေတြကို လိုက္ရွာပါ။ မေတြ႔ရင္ အေပၚက Filter ထဲမွာ ရိုက္ျပီး ရွာလိုက္ရင္လည္း ရပါတယ္။ ေတြ႔ျပီးဆိုရင္ ၄င္းတို႔ေပၚမွာ double click လုပ္ျပီး values ေတြကို true လို႔ေပးလိုက္ပါ။ ျပီးရင္ network.http.pipelining.maxrequests ေပၚမွာ double click လုပ္ျပီးရင္ ၄င္းရဲ႕ value ကို 8 လို႔ေပးလုိက္ပါ။၂။ Content switch threshold ကို ေလွ်ာ့ခ်ျခင္း
အကယ္၍ သင့္ရဲ႕ mouse (သို႔) keyboard ကို မေရႊ႕ မထိပဲ 0.75 စကၠန္႔႔ (Content Switch Threshold ) ၾကာခဲ႔မယ္ဆိုရင္ Firefox ဟာ frequency နိမ့္တဲ႔ interrupt mode ထဲကို ေရာက္သြားပါလိမ့္မယ္။ ဆိုလိုတာကေတာ့ ၄င္းရဲ႕ ၾကားခံဆက္သြယ္ေပးတဲ႔စနစ္ဟာ တုန္႔ျပန္မႈနည္းလာပါလိမ့္မယ္...ဒါေပမယ့္ သင့္ရဲ႕ page loadေတြကေတာ့ ပိုျပီးျမန္ဆန္လာမွျဖစ္ပါတယ္။ ဒါေၾကာင့္ အခုလိုပိုျပီးျမန္ဆန္လာေစဖို႔ Content Switch Threshold ကို ေလွ်ာ့ခ်ေပးဖို႔လိုပါတယ္။ about:config ကိုရုိက္ Enter ေခါက္ ျပီးရင္ ပြင့္လာတဲ႔ windows ေပၚမွာ right-click လုပ္၊ ျပီးရင္ New ထဲကမွာ Integer ကို click ၊ အဲဒီေနာက္ content.switch.threshold လို႔ရိုက္ OK ေပး ျပီးရင္ 250000 ( a quarter of a second ) ကိုထည့္ OK ေပးလိုက္... ဒါဆိုရပါျပီ။၃။ Flash ကို Block ျခင္း
Flashblock extension ကို Install လုပ္ဖုိ႔လိုက္ပါ။ ( http://flashblock.mozdev.org တြင္ download ျပဳလုပ္ပါ။) ၄င္းက Flash appletေတြ အားလံုးကို loading ျပဳလုပ္ျခင္းမွာ block လုပ္ပါလိမ့္မယ္။ ဒါေၾကာင့္ web pages ေတြဟာ ပိုျပီးျမန္ျမန္ဆန္ဆန္ ေဖာ္ျပေပးပါလိမ့္မယ္။ အကယ္၍ Flash content အခ်ိဳ႕ ကို ရွာေဖြခ်င္တယ္ ဆိုရင္ေတာ့ ၄င္းရဲ႕ Placeholder ကို download အတြက္ click လိုက္ျခင္းအားျဖင့္ ပံုမွန္အတိုင္း applet ကို ျပသေပးပါလိမ့္မယ္။၄။ cache အရြယ္အစားကို တိုးေစျခင္း
သင္ web တစ္ခုကို ဖြင့္ၾကည့္လိုက္စဥ္မွာ Firefox က site ရဲ႕ images နဲ႔ scriptေတြ ကို local memory cache တစ္ခုထဲမွာ သိမ္းဆည္းထားလိုက္ျပီး အကယ္၍ သင္က တူညီတဲ႔ page တစ္ခုကို ျပန္ျပီးဖြင့္မယ္ဆိုရင္ locak memory cache ကေန သိမ္းထားတဲ႔ အခ်က္အလက္ေတြကို ပိုျပီး ျမန္ျမန္ဆန္ဆန္ ျပန္ထုတ္ေပးႏိုင္ပါတယ္။ သင့္မွာ RAM အမ်ားၾကီး( 2GB နဲ႔အထက္ ) ရွိတယ္ဆိုရင္ ဖြင့္ျပီးသား page တစ္ခုကို ျပန္ဖြင့္တိုင္းမွာ ျမန္ျမန္ဆန္ဆန္ဖြင့္လို႔ရေစဖုိ႔အတြက္ cache size ကို တိုးထားသင့္ပါတယ္။ ဒီ့အတြက္ about:config လို႔ရိုက္ Enter ႏွိပ္ ျပီးရင္ ပြင့္လာတဲ႔ window ထဲက ဘယ္ေနရာမွာမဆို right-click ျပီးရင္ New ထဲက Integer ကိုသြားပါ။ အဲဒီထဲမွာ browser.cache.memory.capacity လို႔ရိုက္ OK ေပး၊ ျပီးရင္ ၄င္းေပၚမွာ double-click လုပ္၊ value ကို 65536 လို႔ရိုက္ OK ေပး၊ အဲဒီေနာက္ သင့္ရဲ႕ browser ကို restart ေပးလိုက္ပါ။၅။ Render ျမန္ေစျခင္း
ၾကီးမားျပီး ရႈပ္ေထြးတဲ႔ web pageေတြကို ဖြင့္တဲ႔ အခါမွာ အခ်ိန္ေတာ္ေတာ္ၾကာတတ္ပါတယ္။ Firefox က သင့္ကို မေစာင့္ေစခ်င္ပါဘူး ... ဒါေၾကာင့္ 0.12 စကၠန္႔တိုင္းမွာ ရရွိတဲ႔အခ်က္အလက္ေတြ(content notify interval)ကို default အားျဖင့္ေဖာ္ျပေပးပါတယ္။ ဒီလိုအခ်ိန္ေတြမွာ browser ဟာ တျဖည္းျဖည္း ဖ်က္ကနဲ႔ ဖ်က္ကနဲ ေဖာ္ျပေပးျပီး တိုးလာတဲ႔ စုစုေပါင္း page loading လုပ္တဲ႔ အခ်ိန္ကိုလည္း မၾကာမၾကာေလ်ာ့က်ေစပါတယ္။ ဒါေၾကာင့္ ၾကီးမားတဲ႔ content notify interval ဟာ ပိုျပီး ျမန္ဆန္ေစပါလိမ့္မယ္။ ဒီ့အတြက္... about:config ကိုရိုက္၊ Enter ႏွိပ္၊ ျပီးရင္ ပြင့္လာတဲ႔ Window ရဲ႕ တေနရာရာမွာ right-click ( Apple userေတြအတြက္က ctrl-click)လုပ္၊ New ထဲက Integer ကို click ျပီး preference name ကို content.notify.interval လို႔ရိုက္ OK ေပး ျပီးေတာ့ 500000 ( ငါးသိန္း) လို႔ရိုက္ထည့္ ျပီးရင္ OK ထပ္ေပးပါ။Window ထဲမွာ right-click ထပ္လုပ္ပါ။ ျပီးရင္ New ထဲက Boolen ကို click ပါ။ ဒီတၾကိမ္မွာေတာ့ content.notify.ontimer ဆိုတဲ႔ value တစ္ခုျပဳလုပ္ျပီး True ေပးလိုက္ပါ။ ဒါဆိုျပီး ပါျပီ။
How to Hack Web Site with IIS Exploit in win xp webdav vulnerablity
This is very easy way to hack web sites there are much sites available for hack them,,,
they should start from this,, this is easy way,
Every one can enjoy so lets start the tutorial
You Can Download and Watch Video Tutorial for iis Exploit in Window xp
 LearnEthicalHacking.Net
 In IIS Exploit we can upload the Defaced page on the Vulnerable Server without any Login. It is most Easiest way to Hack any site.
STEP 1: Click on Start button and open “RUN”.

STEP 2: Now Type this in RUN
%WINDIR%\EXPLORER.EXE ,::{20D04FE0-3AEA-1069-A2D8-08002B30309D}\::{BDEADF00-C265-11d0-BCED-00A0C90AB50F}

STEP 3: Now “Right-Click” in the folder and Goto “New” and then “Web Folder“.

STEP 4: Now type the name of the Vulnerable site in this. e.g.” http://autoqingdao.com/” and click “Next“.

STEP 5: Now Click on “Finish“

STEP 6: Now the folder will appear. You can open it and put any deface page or anything.

STEP 7: I put text file in that folder. Named “securityalert.txt” (you can put a shell or HTML file also). If the file appear in the folder then the Hack is successful but if it don’t then the site is not Vulnerable.

.
Now to view the uploaded site i will go to “http://autoqingdao.com/securityalert.txt”In your case it will be ” http://www.sitename.com/file name that you uploaded] “
Hack Admin Password From User Mode(ကုိယ့္စက္ကုိ ထိန္းထားတဲ့ Admin password ကုိ hack ရေအာင္)

Hack Admin Password From User Mode
Disclaimer: Use this article for eductational purpose ONLY.
Follow these steps:
1. Open command prompt (Start->Run->cmd),
2. Enter the following command, then press ENTER
3. Enter the followin command, then press ENTER:
compmgmt.msc
This should open the computer management console.
4. Go to local users & groups->users. Right click on any user and select “set password”.
If you get a “access denied” do the following:
start>run>cmd
then use following commands
1) net user test /add (this command will make test named user)
2) net localgroup administrators test /add (this command will make test user as administrators rights)
and use net user command to reset your admin. password
Alternative
What if u don’t know the password of your admin and still want to hack and change .. yea u can do it ..in a very easy manner.. check this. just follow the steps.. this doesn’t require u to know the admin password but still u can change it..
Start >> Run >> [type]cmd // this will open your command prompt
[type] net(space)user(press enter)
[type] net(space)user(space)[windowsloginid](sp ace)*(press enter)
// for e.g. : net user HOME *(press enter)
[type] new password (press enter) and retype it (press enter).. it will show u confirmation… // caution it wont show u the password u type.. but it still types.. the blinking pointer will b there at the same place.. but it still works..
// for e.g. : password changed successfully.
MTK Model ေတြ အပါအဝင္ ဖုန္းအမ်ဳိးအစားေပါင္း 2000 ေက်ာ္ကို ေအာင္ျမင္စြာ Root ႏုိင္တဲ့ V Root ေခၚ ROOT Masters version အျမင့္ 1.4.0.2955

MTK Model ေတြ အပါအဝင္ ဖုန္းအမ်ဳိးအစားေပါင္း 2000 ေက်ာ္ကို ေအာင္ျမင္စြာ Root ႏုိင္တဲ့ V Root ေခၚ ROOT Masters version အျမင့္ 1.4.0.2955 ဒီေကာင္က တရုတ္ Root Tool တစ္ခုျဖစ္ၿပီး နာမည္ႀကီး Master Brand တံဆိပ္ 1000 ေက်ာ္ကို Root ႏိုင္လို႔ သိရပါတယ္.. Master Brand လို႔ ဆိုလိုက္တာက Samsung, HTC, Huawei, ZTE စတဲ့ Brand ေတြကို ေျပာတာပါ. Model အလုိက္ ေဖၚျပထားျခင္းေတာ့ မေတြ႕ရပါဘူး.. အရင္ကလည္း တစ္ခါ တင္ေပးခဲ့ဖူးပါတယ္. အဲဒီတုန္းက ဗားရွင္းနိမ့္ၿပီး အမ်ဳိးအစား 1000 ေက်ာ္ Root ႏိုင္ပါတယ္. ခု 2000 ေက်ာ္ Root ႏိုင္တဲ့ New Version ပါ.. ဒီေကာင္ကို V Root လို႔လူသိမ်ားၿပီး တကယ္က်ေတာ့ သူ႔နာမည္ကို လိုက္ရွာတဲ့အခါ ROOT Masters or Masters Brush (Brush Master Integration ROOT) ျဖစ္ပါတယ္..
နည္းလမ္းကေတာ့
ပထမဆံုး Driver ကို သိရပါမယ္.. မရွိရင္ ဒီမွာ ေဒါင္းႏိုင္ပါတယ္.. Model အလိုက္ USB Debugging နဲ႔ Unknown Source ကို On ေပးထားရပါမယ္..
1 . ROOT Masters ကို ေဒါင္းၿပီး Install လုပ္ပါ.. ၿပီးရင္ Run လိုက္ပါ..
2. ဖုန္းကို Computer နဲ႔ ခ်ိတ္ဆက္လိုက္ပါ.. Driver သိတယ္ဆိုရင္ ROOT Masters 1.3.2.2905 ကလည္း သိေၾကာင္း ေပၚလာမွာျဖစ္ပါတယ္..
3. ဒါဆိုရင္ Root Button ( အစိမ္းေရာင္ Green Button ) ကိုႏွိပ္လိုက္ပါ.. Root လုပ္ေနတာ ျမင္ရပါလိမ့္မယ္..


4. ခဏေနရင္ေတာ့ Root လုပ္ၿပီးေၾကာင္း ျပေပးပါလိမ့္မယ္..
ဒါဆို အဆင္ေျပေလာက္ပါၿပီ..
Download Here !
or
Download Here !
Online မွာဘဲ ဓာတ္ပုံေတြကုိ လွလွပပ ျဖစ္ေအာင္ ျပင္ႀကမယ္။
Online မွာဘဲ ဓာတ္ပုံေတြကုိ လွလွပပ ျဖစ္ေအာင္ ျပင္ႀကမယ္။


အရာရာအဆင္ေျပၾကပါေစဗ်ာ
firefox ကုိဒီေဆာ႕၀ဲထည္႕

ဒီေဆာ့၀ဲေလးကေတာ့ ဖုိင္းရားေဖာက္ သံုးတဲ့သူေတြအတြက္ အျမန္ပြင့္ေစတဲ့နည္းပါ
အရင္တင္ဖူးပါတယ္ လင့္ေသေနတာ ျပန္ရွာရ မလြယ္ကူပဲလို ့ထပ္တင္လိုက္ပါတယ္
အင္တာနက္က ေႏွးေနေနတာဆိုရင္ေတာ့ ျမင့္ေနလည္း အလကားပဲ ။ ဒါေပမယ့္လဲ
ျမင့္ေပးထားေတာ့ မျမင့္တာနဲ ့စာရင္ေတာ္ေသးတာေပါ့ မူလထက္ေတာ့ ျမန္လာ၏
စမ္းသံုးခ်င္သူမ်ား ေအာက္က လင့္မွာ Download ယူပါ.....................................။
ဒီလင့္မွာ Download ယူပါ - www.mediafire.com/Speed up firefox App
portable ျပဳလုပ္နည္း

portable ဆိုတာဘာလဲ.....?portable ဆိိုတာက install လုပ္စရာမလိုပဲ memory stick ထဲထည္ ့ျပီးဘယ္သြားသြားယူသြားလို ့ရသလို game ကအစ application အဆံုးျပဳလုပ္လို ့ရပါတယ္။
အင္တာနက္ဆိုင္ေတြမွာအသံုးျပဳတဲ ့သူငယ္ခ်င္းေတြဆိိုရင္ေတာ ့မိမိတို ့နွစ္သက္တဲ ့(ဥပမာ-photoshop ;internet download manger ;firefox browser စသည္ျဖင္ ့အမ်ားၾကီးျပဳလုပ္လို ့ရပါတယ္ခင္ဗ်ာ။
ဒီေန ့ေတာ ့portable ျပဳလုပ္နည္းေလးကိုအလြယ္အကူဆံုးျပဳလုပ္နည္းတစ္ခုျဖစ္တဲ ့ win rar ကိုသံုးျပီးျပဳလုပ္ေပးသြားမွာျဖစ္ပါတယ္။win rar ကေတာ ့စက္တိုင္းလိုလိုမွာရိွျပီးသားျဖစ္မွာပါမရိွေသးရင္ google မွာေဒါင္းပါ။ဒီေနရာမွာinternet download manger ကိုအသံုးျပဳျပီးportable တစ္ခုျပဳလုပ္ေပးသြားပါမယ္ခင္ဗ်ာ။
(အဆင္ ့-၁ ) desktop မွာ IDM Floder အလြတ္တစ္ခုေဆာက္ပါ။
(အဆင္ ့-၂) start > all program > IDM open file location >ကေနသြားျပီး ရိွသမ်ွဖိုင္ေတြအကုန္လံုးကို copy ယူပါ။ေအာက္မွာပံုေလးျပထားေပးပါတယ္

(အဆင္ ့-၃ ) copy ယူလာေသာဖိုင္ကို desktop ေပၚရိွ IDM Folder ထဲကို paste လုပ္ပါ။ျပီးရင္ win rar ထဲမွ add to archive ထဲကိုထည္ ့လိုက္ပါ။

(အဆင္ ့-၄ ) general archive name ေနရာတြင္ internet download manger .portable.rar ဟုအမည္ေပးပါ။ create SFX archive ကိုအမွတ္ျဖစ္ပါ။

(အဆင္ ့-၅) advanced ကိုနိပ္ျပီး SFX options ကိုနိပ္ပါ။

(အဆင္ ့-၆ ) ေအာက္ကပံုအတိုင္း internet download manger .exe လို ့အမည္ေပးပါ။မွတ္ခ်က္(Desktop Folder ထဲမွ application ဖိုင္ကနာမည္အတိုင္းInternet download manger.exe ဟု နာမည္ေပးပါ)

(အဆင္ ့-၇) modes ကိုသြားျပီး unpack to tempoary floder နွင္ ့ hide all ကိုအမွတ္ျဖစ္ပါ

(အဆင္ ့-ဂ ) ဒီအဆင္ ့မွာေတာ ့ icon ျပဳလုပ္ျခင္းျဖစ္ပါတယ္။portable ျပဳလုပ္ျခင္းမွာicon မလုပ္လည္းျပသနာမရိွေသာေၾကာင္ ့မေဖာ္ျပေတာ ့ပါခင္ဗ်ာ။
(အဆင္ ့-၉ ) Desktop ရိွ IDM folder ထဲမွာ IDM Portable ကလြဲရင္က်န္တဲ ့ဖိုင္ေတြျပန္ဖ်က္ပါ။

(အဆင္ ့-၁၀ ) logo လုပ္ခ်င္သူမ်ားအတြက္ကေတာ ့ ok မနိပ္ေသးပဲ tex and icon ကိုနိပ္ျပီး load SFX icon fron the file မွာ မိမိ ထားခ်င္တဲ ့icon ကိုထည္ ့ပါ။ extension မွာ .ico ျဖစ္ရပါျမည္။
မွတ္ခ်က္။portable ဖြင္ ့မရျဖစ္ခဲ ့ေသာ္ desktop မွ folder နွင္ ့မူလေဆာ ့ဝဲမွ application အမည္လြဲေနေသာေၾကာင္ ့ျဖစ္ပါသည္။ rar / exe ဆိုတဲ ့လကၡာေလးေတြထည္ ့ေပးဖို ့မေမ ့ပါနဲ ့ခင္ဗ်ာ။
IDM Portable အသံုးမျပဳမိီ Mozilia Firefox ; Internet exploer တို ့ကိုပိတ္ျပီးမွ IDM ကို RUN ပါ
အသစ္တင္တိုင္း facebook ကေနဖတ္ခ်င္တယ္ဆိုရင္
ဒီမွာ like လုပ္ေပးပါ။
Subscribe to:
Posts
(
Atom
)


